Inside
WI > BaRC >
Graphics > Scanning
> Resolution
Resolution
Basics
........
Resolution
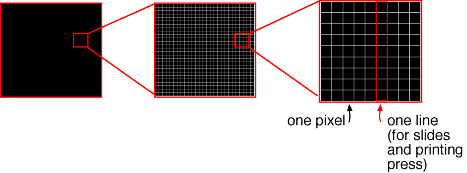
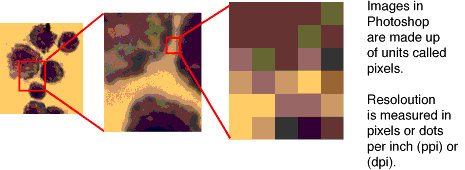
is determined by the size of the units of information representing an
image. A pixel is a unit of information displayed on a monitor. Each
pixel holds a defined amount of information stored on your disk. An
image of a given area will become more detailed as more pixels are used
to describe it.
Resolution
can be measured in many ways:
1.
Samples per inch (spi, scanners)
2.
Pixels per inch ( ppi monitors)
3.
Dots per inch (dpi, printers)
More
pixels in a given area will give you a smoother, more detailed image
but it will also give you a much larger file.
Fortunately, as the pixels become smaller and smaller, the difference
between high resolution and extremely high resolution are not discernible
by the human eye, and are not reproducible on our printers (although
a professional printing press is capable of much higher resolution than
our printers here).
The
key is to find the point at which you no longer get a benefit from additional
resolution. For output to Whitehead devices, that point is between 300
and 400 ppi.
We
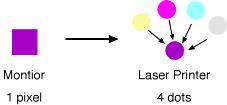
often use dpi as a generic term, but that isn't accurate. Sometimes
a printer (such as laser printers) will use several dots of different
colors to make the color of one pixel of an image. This is why even
though a printer may have a 600 dpi capability, it doesn't mean the
same thing as 600 ppi resolution.
Scaling........back
to top
So
far resolution has been easy, but scaling is where you can ruin an image
if you aren't careful.
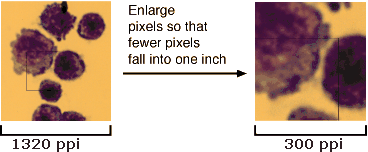
Because
pixels make up an image, it makes sense to enlarge or reduce an image
simply by making the pixels bigger or smaller.
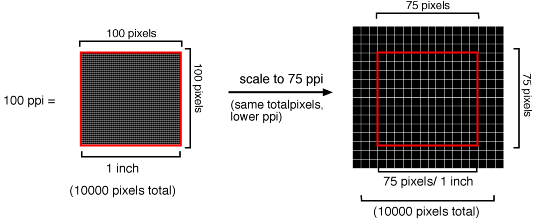
Photoshop
has a dialog box called "Image Size" (Image > Image
size).
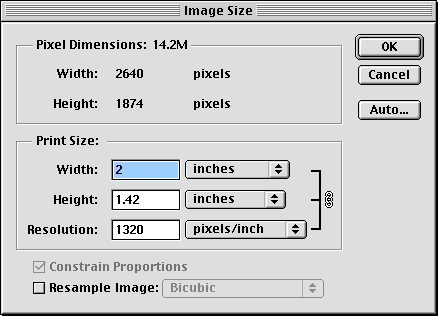
To scale by enlarging pixels, make your changes in the Image Size dialog
box and make sure the "resample image" box is not checked.
Notice the linking symbol to the right of the width, height, and resolution
boxes. This indicates that changes in width and height will be accomplished
by altering the resolution (size of pixels), or changes in resolution
will be made through changing the width and height.
Although
I said that the resolution will be changed, as long as it doesn't drop
below the minimum threshold of roughly 300-400 ppi, you won't be able
to detect the difference in output.
This
is why planning ahead and beginning with enough resolution is essential.
Making
changes this way will not permanently alter your image. You can change
it back and forth all day without losing any information.
ResamplingBackbback
to top
Resampling
can be dangerous because instead of only enlarging or reducing the size
of pixels, it actually adds or removes pixels in your image. It is not
reversible (except by undo). However, it can be very useful if used
carefully. There are two reasons to resample:
1.
You want to change the resolution without affecting the dimensions
2.
You want to change the dimensions without affecting the resolution (you
don't have any extra resolution to use for enlarging an image).

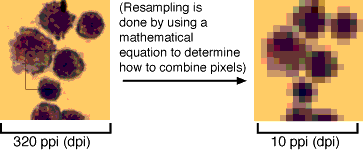
Reducing
resolution by resampling is called "downsampling". A mathematical
equation is used to determine how pixels should be combined to achieve
the desired number of pixels per inch. The same process is used to increase
resolution and is called "upsampling". As you can see from
the example above, upsampling doesn't really give more detail to your
image, it just takes up more space on your disk. (Although it can reduce
graininess).
Downsampling:
In the example below, reducing the number of pixels per inch from
320 to 10, the image becomes very pixelated.
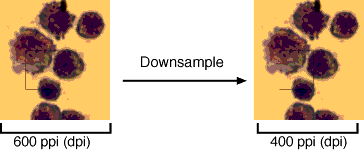
However,
from 600 dpi to 400 dpi, as shown below, you aren't likely to see
a difference, because our best printer has a limit of 400 dpi. The
benefit of downsampling is that you get a much smaller file size that
is easier to store and work with. But be careful! If you resample
to lower resolutions than 300, your image will start to look pixelated.
How
to do it: Remember that extreme scaling
by resampling may cause your image to look pixelated.
Scaling
by resampling Backback
to top
If
you have no extra resolution to use for enlarging an image (see scaling),
then you have no choice but to resample. You can do this by checking
the resample button in the Image Size dialog box, or you can select
the image and hit "command-T " (for transform), to manually
stretch the image. Holding shift while scaling will keep the proportions
constant.
Changing
resolution by resampling
Back
If
you want to change the resolution of your file (because it is above
400, if you need to save disk space, or if you want the resolution of
one image match another), Go to the Image > Image Size dialog
box and check the "resample" button. Now change the resolution.
This is not reversible (except with the history palette or "undo").
Repeatedly changing the resolution by resampling will cause pixelation
of your image.
Remember,
adding resolution to your file will not increase the level of detail,
but will increase your file size exponentially.
Guidelines
for choosing resolution
Backback
to top
For
prints and slide output,
your final images should be somewhere between 300 and 400 ppi.
For
the web, you only need 72 ppi.
When
scanning slides, keep in mind that you
will want to scale the image later. Give yourself plenty of extra resolution
to do that, and then when the size is final, discard any resolution
above 400 as described above.
|


