Merging Fluorescent Images
It is often desirable to assign a separate transparent color to each of two
or three images so that when you combine them, you can easily identify
the areas where overlap occurs. The way to do this is to put each image
on its own color channel. The Channel Mixer automates this process, and
makes aligning the images much easier. Here is how to do it:
- Open your images. They should be saved as TIFF and the mode should
be set to grayscale. (Go to Image>Mode and choose grayscale
if this is not already the case). If you have only two images to merge,
open a third anyway just as a placeholder.
- Select one of the images and choose "merge channels"
from the channel palette menu. (Find channel palette under the Windows
menu, and then click on the arrow at the top right of the palette to see
options).
- Choose RGB color mode.

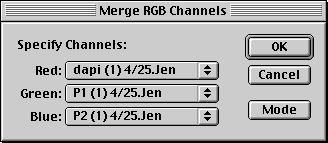
- Assign a file to each color channel
Click on the scroll bars until the correct file is matched with the desired channel. If you are using a placeholder for your third file, assign it the extra color. When you are finished, click OK.
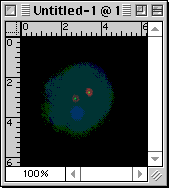
A new file will be created with your images in separate color channels.

- If you are using a placeholder for a third file, you can now delete it. To do this, select the channel, click with your move tool in the work area, and choose command-a (or Edit > Select All). Then click the delete button. The next step is to fill this area with black, by selecting the entire work area with that channel selected, going to the Edit menu, and choosing Fill > with black.
- Adjustment: Once your images are combined,
you can select individual channels and use Levels or Curves
adjustments on them to vary the relative brightness or contrast of that
channel. If there is a lot of background noise on a channel, a Levels
adjustment can bring the background back to black. (see Levels)

