Inside
WI > BaRC >
Graphics > Illustrator
CS
Illustrator
CS
Illustrator
CS is a great software tool, which has become more user friendly
in recent versions. Because the interface is similar to Adobe's Photoshop,
it is a good choice for someone who is already familiar with Photoshop
or who will need to use it often. Because both products are made
by Adobe, the integration is seamless. You can even drag and drop
files between the programs. Add Adobe's InDesign program (an alternative
to QuarkXPress) and you have all the software you need to make slides,
edit images and write papers and grants.
Preferences
Before
you begin, you may want to check out the Preferences dialog box, to
set such things as units and number of levels of "undo". To
do this go to Edit > Preferences.
Tools..............back
to top
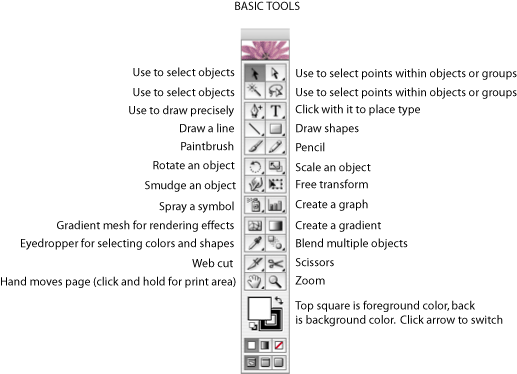
Selection
Tools .............back
to top
One of
the most noticeable differences between Illustrator and our other programs,
Canvas and FreeHand, is that instead of one selection tool, Illustrator
has two:
 Selection tool: The black arrow is used for selecting objects and groups
of objects.
Selection tool: The black arrow is used for selecting objects and groups
of objects.
 Direct Selection tool: The white arrow is used for selecting points
within objects or within groups.
Direct Selection tool: The white arrow is used for selecting points
within objects or within groups.
These
tools are a bit fussy. When switching from one to the other, make sure
to first deselect (by clicking off to the side or choosing Edit >
Deselect All) before selecting with the new tool.
Viewing
the Work Area ............back
to top
Go to
View > Fit in Window to see the whole page, or use the Zoom
tool  to get a closer look at part of the page. Clicking with the zoom tool
will magnify the area clicked, or using the zoom tool to draw a box
around the desired area will enlarge that area. Hold the option key
while clicking to zoom out for a more distant view.
to get a closer look at part of the page. Clicking with the zoom tool
will magnify the area clicked, or using the zoom tool to draw a box
around the desired area will enlarge that area. Hold the option key
while clicking to zoom out for a more distant view.
Inserting
Pictures ..........back
to top
Files
from Photoshop can be dragged from the Photoshop window and dropped
right into the Illustrator window.
In addition,Illustrator
can import files in the following formats using the File>Place command:
Photoshop,TIFF, EPS, CorelDraw, FreeHand, GIF, JPEG, PICT, DXF, Adobe
PDF, and PostScript Level 1, PNG, Photo CD, and TGA.
Linked
vs. Embedded:
When you drag and drop or place files into illustrator, they will be
either linked or embedded, depending on what you have chosen in the
"Place" dialog box.
Linking:
placed file remains separate from the Illustrator document. A lower
res. image holds its place in Illustrator while you work, but the printer
follows the path to the original at print time.
-easier
to work in Illustrator because of smaller file size.
- better
print quality because the original is used.
-more
complicated to keep track of multiple linked files. I recommend putting
all linked files and the Illustrator document in one folder, and always
moving or copying the entire folder to avoid breaking the link.
Embedding:
placed file becomes part of the Illustrator document.
-file size may become large and the program may run
slower
-print quality may not be as good as from the Photoshop
file, although because they are both Adobe, this might not be true in
this case.
-No worries about keeping track of lots of files.
They are all included.
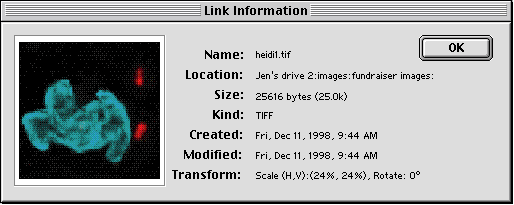
Viewing
Linked files: Go to Window >Show Linked..............back
to top
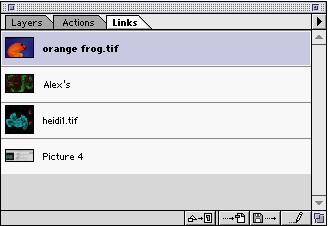
The palette
will show all the images imported from outside. Click the arrow at the
top right for more information about the files. You can choose to embed
linked files at this point, or link embedded ones. You can also get
all the information about the file:
Cropping
imported files..............back
to top
There
is no cropping tool in Illustrator. Instead, you will make a "clipping
mask" which hides what you don't want to see.
| 1.
Draw a box (with no fill color) around the area you would like
to crop.
2.
Select both objects. |
 |
| 3.
Choose Object> Clipping Mask > Make. |
 |
| 4.
Make the outline disappear by choosing "no color" for
line color. See "Color" below.

|
 |
The white
arrow lets you move the image inside the clipping mask to adjust what
is visible, and the black arrow lets you move the cropped image or change
the size of the frame.
Color
..............back
to top
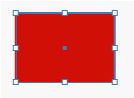
Color
Palette:
If you
do not see your color palette, go to Window > Show Color.
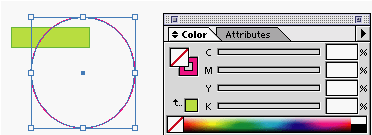
Fill (color
inside a shape) and stroke (color of a line) are represented by a box
and an outline of a box. In the palette above, the fill color box has
a red diagonal line through it, symbolizing "no color". The
stroke box has a pink color. This arrangement refers to the selected
circle at the left, which has no fill and a pink stroke. You can tell
there is no fill because the other object is visible behind it. You
can change a color by moving the CMYK sliders in the palette. When you
get a color you like, drag it to the Swatches Palette (below), which
you can open by choosing Window > Show Swatches.
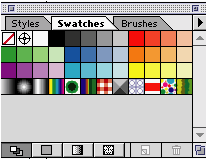
When you
click on any swatch in this palette, the fill in the Color Palette will
take on that color, as will any selected object in the work area. If
you click on the stroke box to bring it to the front, then stroke will
be the attribute changed when a new swatch is clicked.
 Eyedropper
tool . You can use this tool to select any color within
the image and drag it into the swatches palette.
Eyedropper
tool . You can use this tool to select any color within
the image and drag it into the swatches palette.
Line
Weight .............back
to top
Go
to Window > Show Strokes
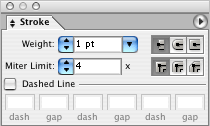
When you
select any line in your work area, you can change it's line weight here,
specify how corners should look, and choose dashed line, if desired.
Arrowheads:
To add arrowheads to any line, select it, then go to Filters >
Stylize > Add Arrowheads.
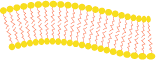
Brushes
& pencil .............back
to top
Illustrator
offers something than no other package does in its selection of natural,
artistic-looking brush strokes. To see some of them, choose Window
> Show Brush Libraries. There are several
libraries to choose from. I show the Artistic Sample here:
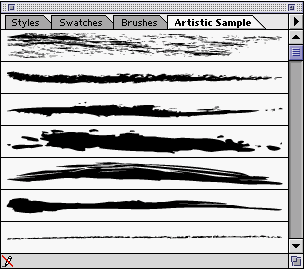
When you
select any line and then choose a brush stroke, your line takes on the
strokes' attributes:

There
are also "scatter" and "pattern" brushes. They provide
some:
But you
can make your own by drawing a shape, selecting it, and choosing "new
brush" in the brush palette:
| |
|
|
| Draw
a shape. Group it.
Select
it and choose "new brush in the brush palette. This example
is a pattern brush. |
|
choose
your new pattern brush
|
Using
the brush
 and the pencil
  ..........back
to top
..........back
to top
To do
the actual drawing, there are three choices, the brush, pencil, or
pen. Brush and Pencil are very similar in that they are both freehand
tools; you use the mouse to draw. The pen is different and will be
covered later. It is more precise but has a steeper learning curve.
Smoothing:
By double-clicking on these tools, you can set options such as smoothing.
This really helps overcome the awkwardness of the mouse.
Correction:
If you make a line and it doesn't come out just right, you can select
the line, and then draw near it with the pencil or brush to make the
correction. The line will automatically correct itself. Because of
this, if you want to make a new line very close to another line, make
sure to deselect first or the second line will replace the first.
-Alternatively,
you can choose the white selection tool and manipulate the points
that make up the line. This might be more precise.
Removing
a brush effect: go to Window > Show Brushes. At the top
right of the palette is an arrow. Click this for a pull-down menu
and choose "Remove Brushstroke".
Cutting
Objects..............back
to top
Slice
Command: Go
to Object > Path > Slice. Using this command, the object
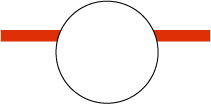
selected becomes a cookie cutter for the objects beneath it:
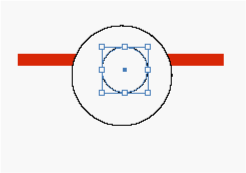
 Knife Tool:
The knife tools cuts along a freeform path that you draw. To use it,
select the object you wish to cut, and use the knife tool to draw
a path:
Knife Tool:
The knife tools cuts along a freeform path that you draw. To use it,
select the object you wish to cut, and use the knife tool to draw
a path:
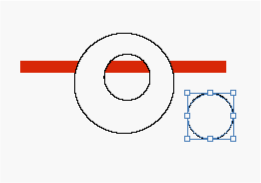
 Scissor
Tool:..............back
to top
Scissor
Tool:..............back
to top
Gradients..............back
to top
Now
that you know how to make shapes, gradient fills will help you make
the shapes appear 3-d.
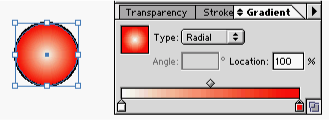 |
Make
a circle and select it. Next go to the gradient palette and choose
"radial" for type. Drag and drop colors onto the gradient
bar at the bottom |
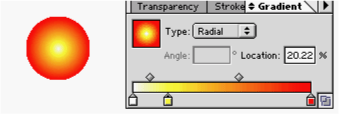 |
You can
add colors to the middle of the bar as well. In this one, I removed
the stroke color. |
Gradient
Mesh..............back
to top
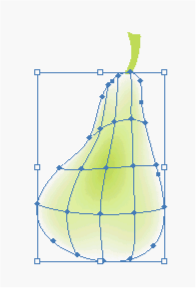
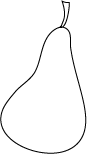
The
previous feature is good, but usually works best for round shapes.
If you need something a little more complex, try the Gradient Mesh
tool.
Here
are the rules:
1. Objects
must be ungrouped, and no compound paths (shapes like a donut, with
a clear middle).
2. Once
transforming a shape into a gradient mesh shape, it can't go back
to being a path, so you might want to save a copy first.
3. Complex
mesh objects can really use a lot of memory and slow down your work,
so start small.
 |
 |
|
 |
 |
| Draw
a shape |
Fill
the shape. (Note that the stem is not grouped with the pear shape.) |
Select
the object and choose Object >
Create Gradient Mesh. |
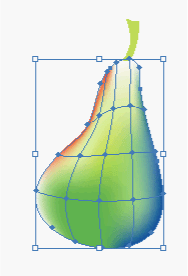
The
diamond shaped points on the mesh can receive color. The space between
the points, "mesh patches", can also receive color . You
can use the direct selection tool to move the points on the mesh
and reshape your gradient. |
I
just dragged and dropped color from the swatches palette to the
mesh points to create this gradient. |
Pathfinder..............back
to top
Window > Show Pathfinder
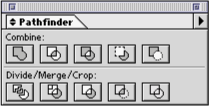
This
palette has all kinds of ways to combine objects to get the shapes
you want quickly and easily. Choose two objects by holding the shift
key while selecting. Then click on one of the options in this palette.
The icons describe the function of each.
Align
Palette ..............back
to top
Window
> Show Align
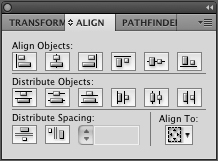
To easily
align multiple objects on the page, select them, and choose one of
the align options, described by their icons.
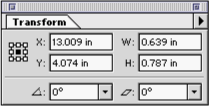
Rotation,
scaling, etc. ..............back
to top
To transform
objects, you can just select them with the selection tool (black arrow)
and move the cursor over the corners of the selection box until you
see the right kind of arrow. A diagonal arrow over the corner will
let you scale. Hold shift to scale proportionally. A curved arrow
over a corner point will let you rotate. A straight arrow over any
side points will let you elongate that side.
For
precise transformation, use the Transform Palette, (Window >
Show Transform)
Text
...........back
to top
To
place text in illustrator, just click with the text tool and type.
Or you can draw a box with the text tool, and when you type, the text
will be contained in the box. To change text attributes, go to the
Type menu and choose Character:
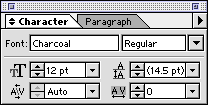
In this
palette, you can choose most text attributes. Click on the Paragraph
tab to see paragraph options.
back
to top
|